Homemade Peanut Butter Dog Biscuits
There is something quietly joyful about baking for your dog.
The sound of paws following you into the kitchen.
The way they sit a little straighter when they smell peanut butter.
The patient waiting near the oven.
These bone-shaped birthday biscuits are simple, wholesome, and genuinely fun to make. They are not complicated. They do not require special equipment. And they turn an ordinary afternoon into a small celebration.
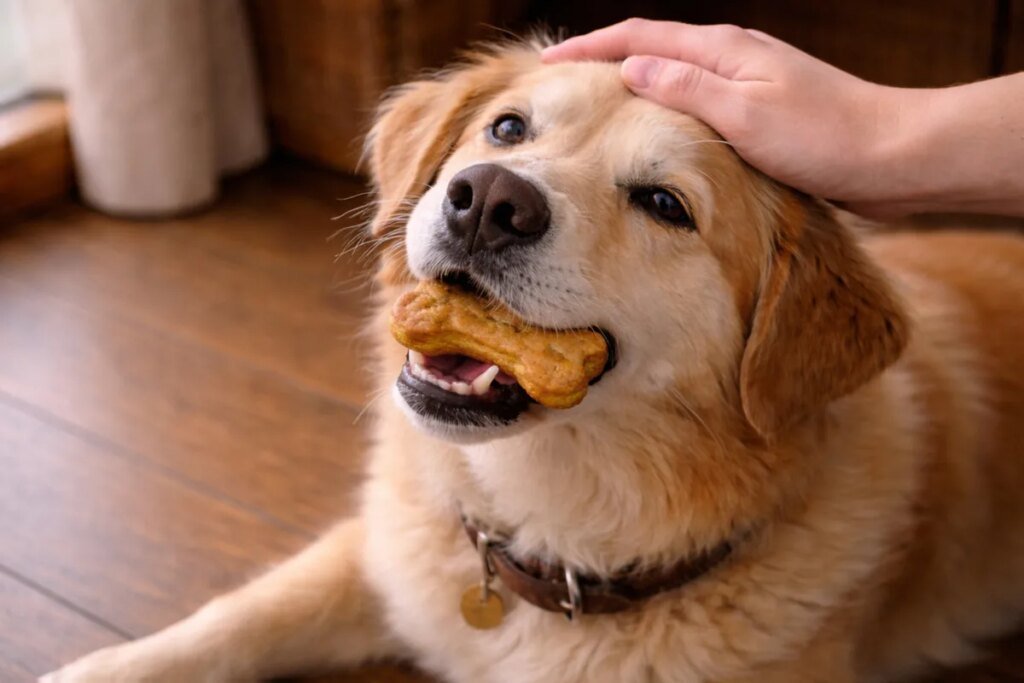
A happy dog often means a peaceful home. When we slow down and prepare something with care, it becomes more than a treat. It becomes part of the memory.
Why Bake Homemade Treats?
Store-bought treats are convenient, and many are perfectly fine. But baking at home gives you something extra: clarity.
You know what goes in.
You choose the texture.
You decide the size.
You adjust for your dog’s needs.
It is less about control and more about connection.
And yes, these biscuits are designed to be both enjoyable and sensible. They use basic ingredients that are commonly well tolerated by healthy dogs. Nothing extreme. Nothing trendy. Just balanced and thoughtful.
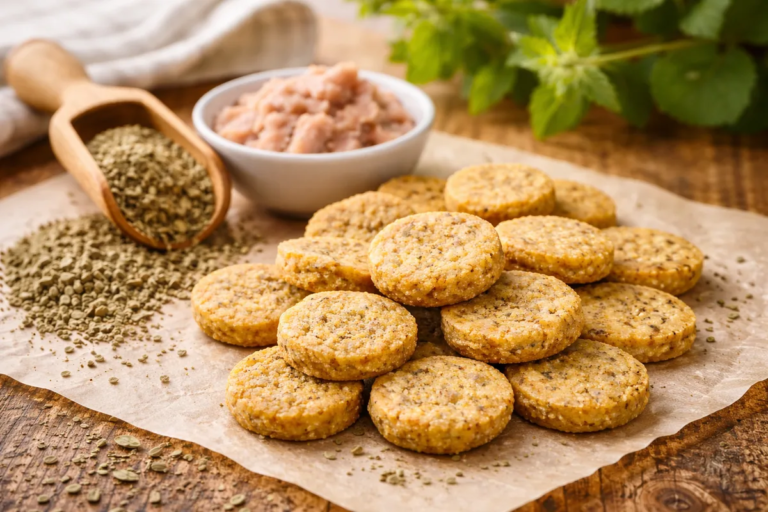
What Makes These Biscuits Special?
These biscuits are:
- Crunchy but not rock-hard
- Easy to shape into bones or simple rounds
- Made with familiar pantry ingredients
- Customizable for different preferences
- Perfect for small celebrations
They look charming on a cooling rack and most importantly, dogs love the smell and taste.
Let’s Talk Ingredients
And Why Each One Matters. Good recipes are simple for a reason. Each ingredient has a purpose.
Whole Wheat Flour
Whole wheat flour creates structure. It gives the biscuit its body and helps it hold shape during baking.
It also adds a mild, nutty flavor and a bit of natural fiber. For many dogs, whole grains in small treat portions are completely fine.
Why use it?
- Provides stability
- Gives the biscuit a pleasant crunch
When to substitute:
If your dog has a known grain sensitivity or you prefer a gluten-free option, you can replace whole wheat flour with:
- Oat flour
- Brown rice flour
- A blend of oat and chickpea flour
Oat flour keeps a similar softness. Rice flour creates a slightly crisper finish. Chickpea flour adds protein but may require a little extra liquid.
The dough should feel soft but not sticky.
Peanut Butter
Peanut butter is the heart of this recipe.
Most dogs recognize the scent immediately. It adds richness, natural protein, and healthy fats. It also helps bind the dough, giving the biscuits their smooth texture and satisfying crunch once baked.
For best results, choose a simple, natural peanut butter.
Look for:
- Peanuts as the main ingredient
- No added sugar
- No artificial sweeteners
- No flavorings
And most importantly, always check the label to make sure it does not contain xylitol.
Some peanut butters use xylitol as a sugar substitute. While it is safe for humans, it is dangerous for dogs, even in small amounts. A quick glance at the ingredient list is all it takes to keep things safe.
When in doubt, choose a jar that lists only peanuts, and maybe a small amount of salt.
If your dog cannot have peanuts, you can use:
- Unsweetened almond butter
- Plain cashew butter
The goal is simplicity. Fewer ingredients, fewer surprises.
Milk
Milk adds moisture and helps transform flour and peanut butter into workable dough.
Why skim milk?
Because peanut butter already provides fat. Using skim keeps the balance lighter while still giving the dough flexibility.
Why lactose-free milk?
Some adult dogs digest lactose less efficiently. Lactose-free milk removes that concern while keeping the same texture.
Why oat milk?
Unsweetened oat milk is gentle and neutral. It works well in baking and blends easily into the dough.
You can also use:
- Goat milk
- Unsalted bone broth
- Plain water
The liquid’s job is simple: hydration and structure. The flavor mostly comes from peanut butter.
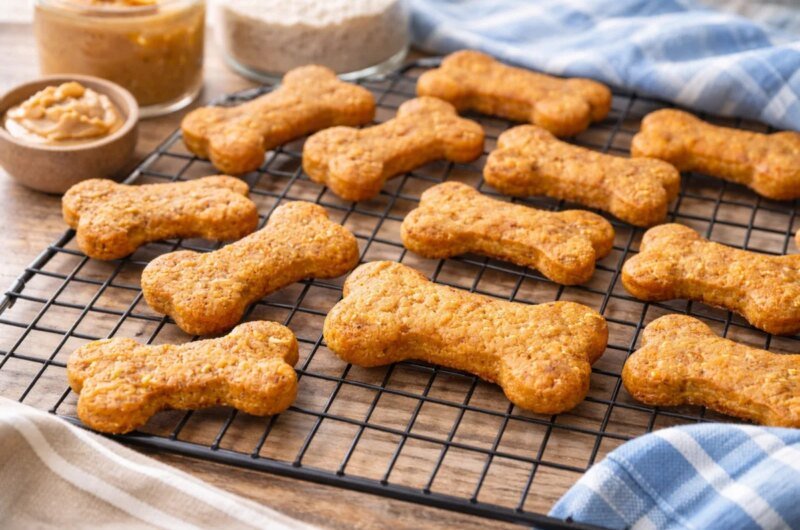
The Texture You Can Expect
Once baked and cooled, these Peanut Butter Dog Biscuits are:
- Lightly crisp on the outside
- Firm enough for a satisfying chew
- Dense but not overly hard
If you want them crunchier, bake a few minutes longer and let them cool in the oven with the door slightly open.
If you want them slightly softer, reduce baking time by two minutes and store them in a tightly sealed container.
Making It Fun
This is the part that matters.
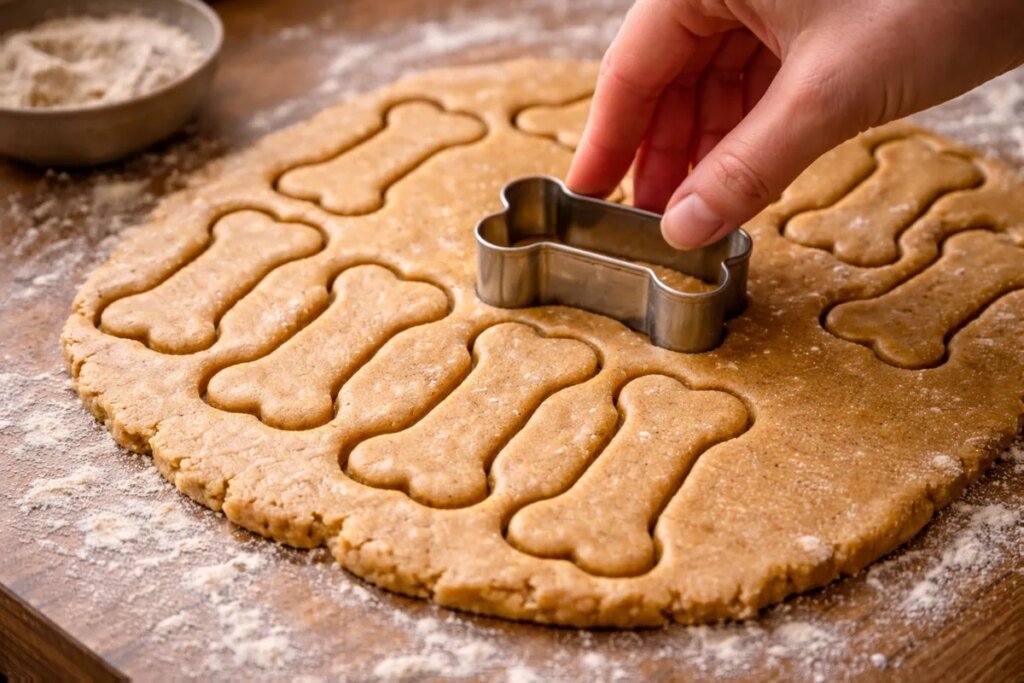
Roll the dough on your counter. Let your dog watch. Cut the shapes slowly. Use a classic bone cutter or simply slice rectangles with a knife.
The scent fills the kitchen gently. No rush. No pressure.
You can even make smaller “training size” pieces from the same dough.
When they cool, line them up on a wooden board or cooling rack.
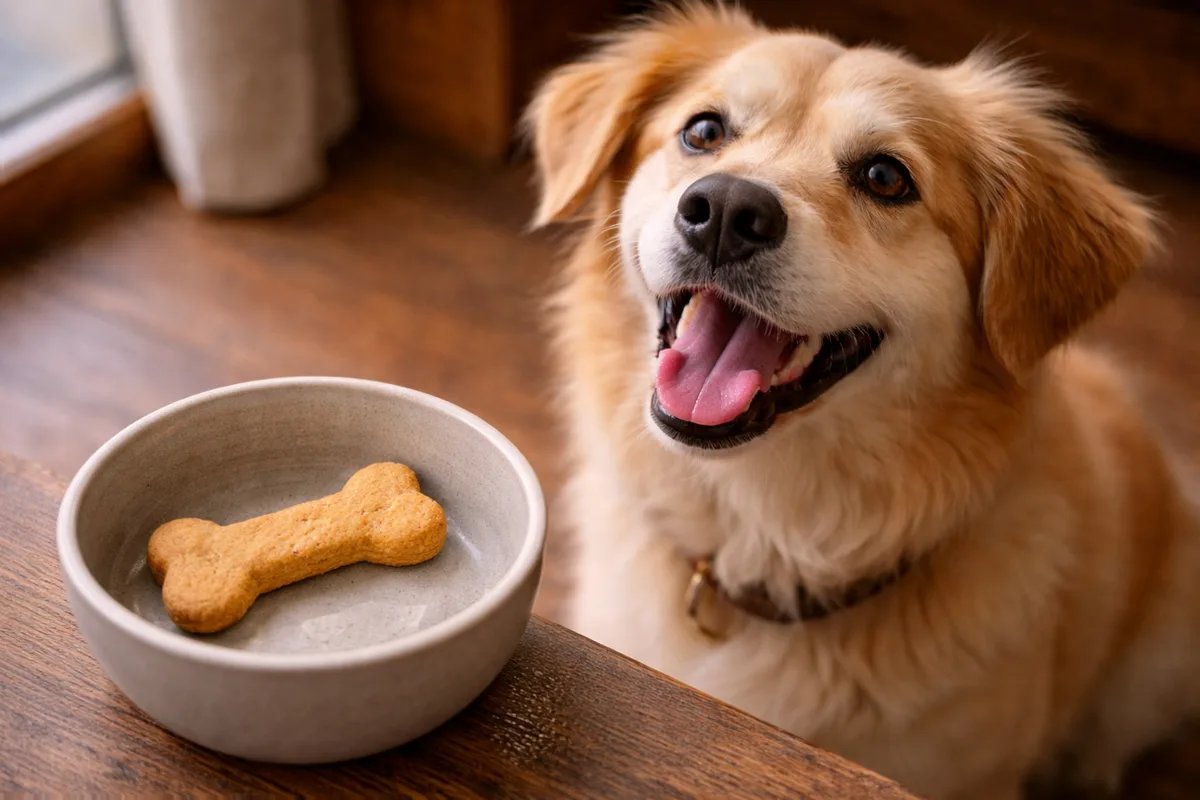
Are They Healthy?
They are designed as occasional treats for healthy dogs.
They contain:
- Whole grains
- Protein and healthy fats
- No artificial preservatives
- No added sugars
They are not meant to replace meals. They are part of a balanced routine.
A happy dog does not need constant indulgence. They need consistency, care, and small moments of joy.
Used thoughtfully, these Peanut Butter Dog Biscuits fit beautifully into that rhythm.
Homemade Peanut Butter Dog Biscuits
12-15
Biscuits10
minutes25
minutesIngredients
120 g whole wheat flour (1 cup)
1½ teaspoons baking powder
125 g natural peanut butter (½ cup)
120 ml milk (½ cup)
Preheat oven to 190°C (375°F)
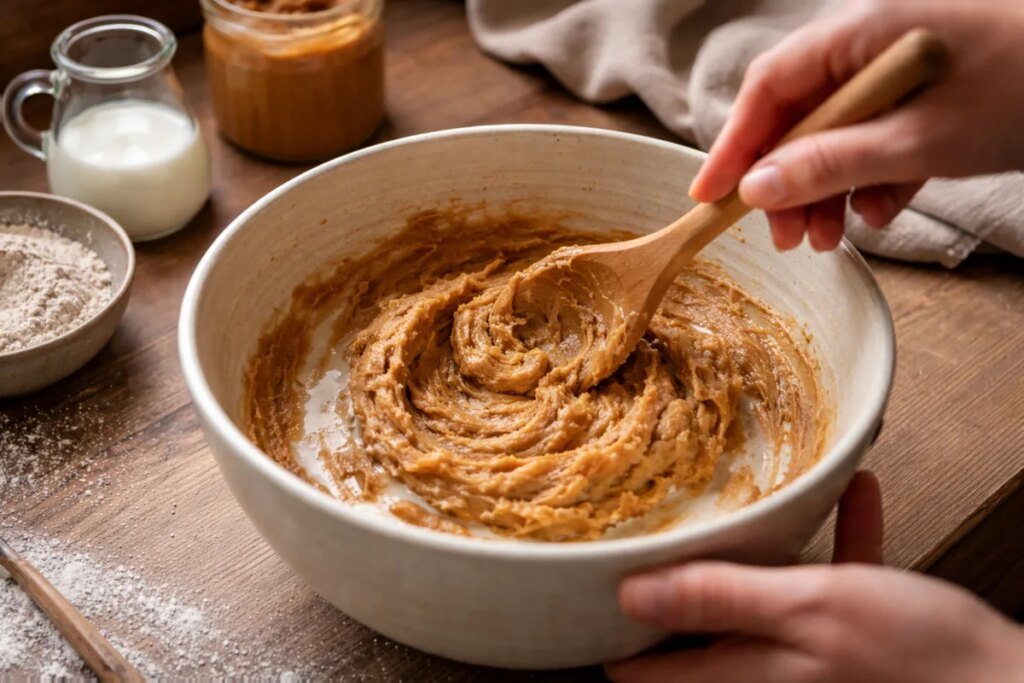
- In a large bowl, whisk together the flour and baking powder.
- In a separate bowl, mix the peanut butter and milk until smooth.
- Pour the wet mixture into the dry ingredients and stir until a dough forms.
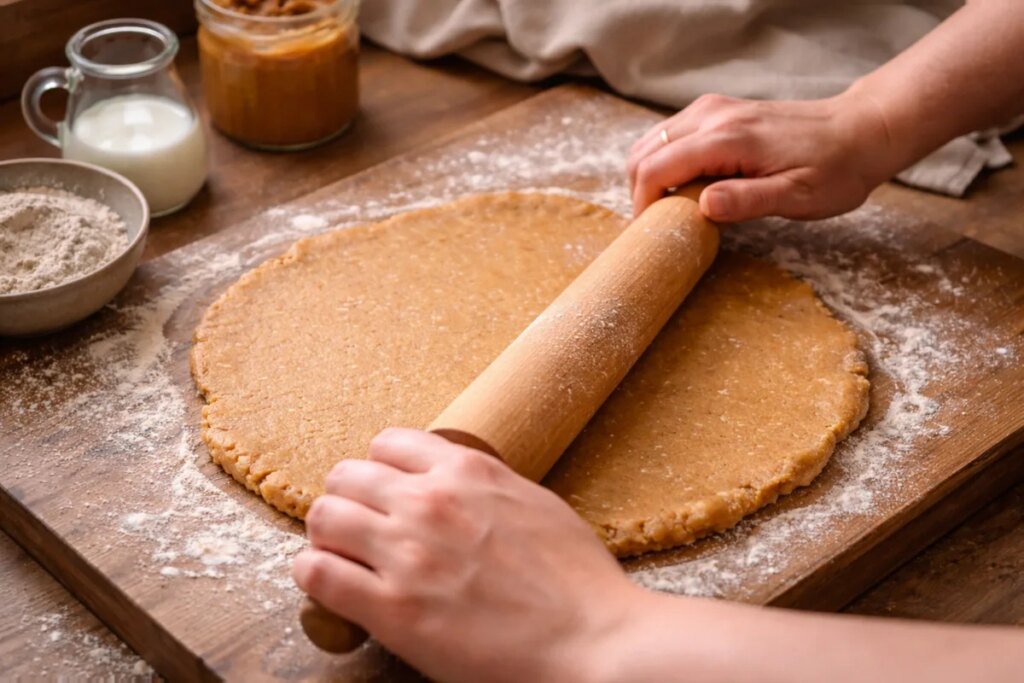
- Lightly flour your counter. Turn out the dough and knead gently for 1 to 2 minutes.
- Roll the dough to about 0.6 cm thick (¼ inch).
- Cut into bone shapes or simple squares.
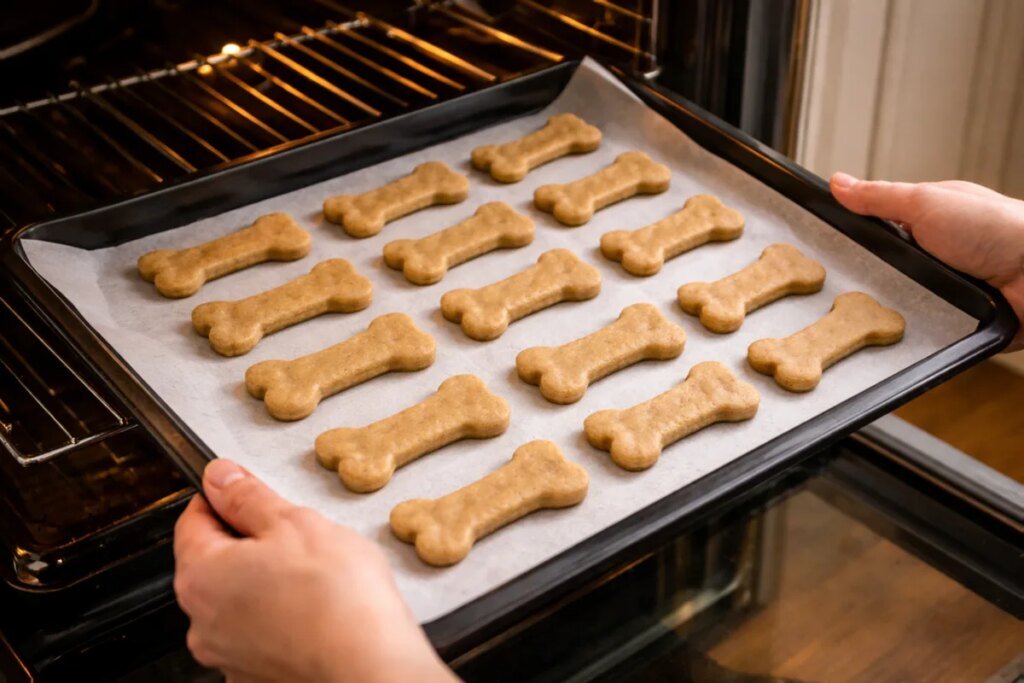
- Place on a lightly greased or parchment-lined baking sheet.
- Bake for 18 to 22 minutes, until lightly golden.
- Cool completely on a rack before serving.
Storage and Freshness
- Homemade treats are best enjoyed fresh.
Room temperature in airtight container: 4 to 5 days
Refrigerator: up to 2 weeks
Freezer: up to 3 months
Adapting for Different Dogs
For Small Dogs
- Roll the dough thinner
- Cut smaller shapes
- Reduce baking time slightly
Portion size matters more than ingredient complexity.
For Senior Dogs
If chewing is more sensitive:
- Bake slightly less
- Store in airtight container for softness
- Or crumble one biscuit over regular food
For Active Dogs
You can add:
- A tablespoon of ground flaxseed
- A spoon of plain Greek yogurt
- Finely grated carrot
Keep additions modest. The dough should stay smooth and firm.
A Cozy Way to Spend an Afternoon
These peanut butter dog biscuits are simple on purpose.
You probably already have most of the ingredients in your kitchen. The steps are easy. The shapes do not need to be perfect. Even slightly uneven edges make them feel homemade.
The best part is not the baking.
It is your dog sitting nearby, watching carefully.
It is the soft tail thump on the floor.
It is the gentle way they take the biscuit from your hand.
That is the real reward.
You do not need a special occasion to make these. A quiet Sunday works. A rainy afternoon works. A random Tuesday works too.
Bake a small batch. Let them cool. Save a few in a jar. Share one slowly.
Sometimes cozy is just that simple.